Tamarind Rice (Khatte Chawal)

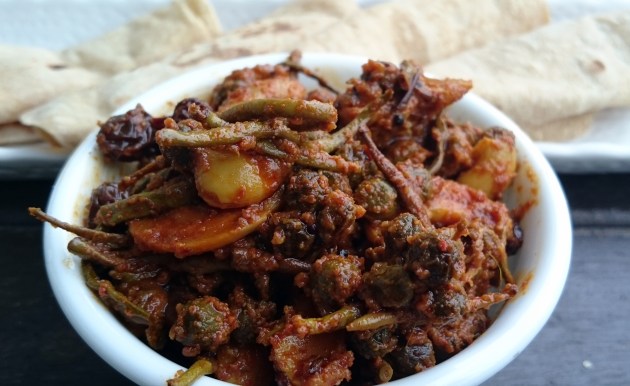
Mom’s indeed are the best cooks in the world. Not because they cook gourmet food but they make normal food taste like gourmet food and that too in minutes. Khatte chawal (this is what my family calls it), known as pulihora/puliodare/puliyogare in south India is tamarind flavored rice with a tempering of nuts, lentils, and spices. This tangy rice is a common prasad at most of the south Indian temples.

This is not an authentic pulihora recipe but this is one of the best I have eaten apart from the ones at temples of course.

The taste and color of this dish depends a lot on the quality of tamarind. To get the best results, clean and soak the tamarind in water for 2-3 hours. It will be easier to get the pulp out. You can also add cashewnuts, urad dal, and grated coconut too. My favorites in this dish are the fresh curry leaves, asafoetida, and just a hint of jaggery.

My mom prepares the tamarind mix in advance and then it is just a matter of minutes to turn plain white rice to tangy and yummy south Indian delicacy. You can store the tamarind mix in fridge for up to a month.

This is a great travel food too. It tastes equally good when it is cold. Try to mix the rice couple of hours in advance before eating.

Ingredients

Serves 2

  • 2 cups cooked plain rice
  • 3-4 tbsp oil
  • ½ tsp mustard seeds
  • ½ tsp asafoetida (heeng)
  • 3-4 green chillies slit
  • 4-5 dry red chillies broken
  • 15-20 curry leaves
  • 1 tbsp chana dal
  • 2 tbsp groundnuts
  • ¼ cup tamarind
  • ½ tsp red chilli powder
  • ½ tsp turmeric powder
  • 1 tsp jaggery
  • Salt to taste

Recipe

Soak tamarind in ½ cup water for 1-2 hours. Mash the tamarind thoroughly using fingers and pass this paste through a sieve. Keep aside. This recipe requires a thick pulp so add as less water as possible.

Heat oil in a non stick pan or a kadhai. Add mustard seeds. Once the seeds pop, add curry leaves, green chillies, dry red chillies. Let them cook for around a minute. Add the chana dal, ground nuts, and asafoetida. Sauté and cook for 1-2 minutes till the dal and ground nuts are lightly browned. Be careful not the burn the dal and the nuts or they will taste bitter. Add the tamarind pulp, salt, red chilli powder, and turmeric powder. Mix well and let this cook on low flame till the oil floats on top (around 6-8 minutes). Keep mixing in between. Let it cool down a little.

Mix few spoons of the tamarind mix at a time in plain rice. You can add more or less mix in the rice based on your taste. If you like the rice sour add more mix. You can store the left over tamarind mix in fridge for upto a month.


Toast Cups

Toast Cups

Toast cups or mini quiches as they look like are a quick way to upgrade a simple toasted sandwich to look like a gourmet snack . It is a very easy dish to make. Bread is rolled, cut, and baked into cups, filled with different savory filling, topped with cheese, and baked into delicious hot snacks.

You can practically fill the toast cups with any filling you like. I like this Mexican filling with corn, capsicum, and paneer. The Mexican taco spice mix or the chili spice mix adds a new flavor and spice to the filling. It also makes it quick to cook.

You can choose to cut the edges of the bread if you like. Rolling the bread will make it easier to cut it and fit in the muffin mould. To add flavor to your toast cups, you can brush the cups with olive oil mixed with dried herbs like oregano, basil, thyme etc. You can use any cheese you like to top the toast cups. If you want to prepare the dish in advance, you can prepare the filling and toast the cups lightly. Assemble and bake the cups just before serving. This snack tastes best when it is hot.

Ingredients

  • 12 slices of bread with the edges cut
  • ½ cup boiled/steamed sweet corn
  • ¼ cup mixed bell peppers chopped
  • ¼ cup paneer chopped
  • ¼ cup onion finely chopped
  • 35 gms Taco seasoning/any Mexican seasoning
  • 5 tbsp olive oil
  • 2-3 tbsp water
  • Cheese to taste ( used cheddar cheese)
  • Salt to taste

Recipe

Heat oil in a pan. Add onions and sauté for 1-2 minutes. Add the bell peppers, paneer, and sweet corn. Mix well and cook for 1-2 minutes. Add the taco seasoning and 2 tbsp water and mix well. Taste and add salt if required. Cook for 3-4 minutes mixing in between. Transfer to a bowl and keep aside.

For the toast cups, roll a bread slice using a rolling pin. Cut a circle using a cookie cutter or a sharp edged bowl. Divide the circle into two. Adjust the semi circles in a muffin tray to make a cup. Follow the same procedure for rest of the bread slices.  Spray the toast cups with olive oil. Pre-heat an oven to 180 degrees Celsius and bake the cups for 10-12 minutes.

Take the tray out of the oven. Add a table spoon of filling in each cup. Top it with grated cheese and bake for 8-10 minutes till the cheese melts. Serve hot.

Rainbow Cupcakes

Rainbow Cupcakes

Cupcakes are my favorites when it comes to baking so when Hannah (my wonderful neighbor) offered me some cake flour and icing a day before Christmas, I already knew how I am going to use it. Unlike other parts of the world, Christmas is not cold and nice in Singapore. To add to my complain about bad weather, this year it was a super wet Christmas with the rain refusing to stop whole day. I wanted to add color to the cupcakes to make us feel happy and colorful in this gloomy weather.

I decided to make simple vanilla cupcakes with as many colors as I can to make them look even more prettier. You can also use sour Indian curd instead of the milk and vinegar mix. But this one needs less whisking than mixing the oil and curd.

You can add as many colors as you like and you can even layer different colors, give a marble effect or try any other creative ideas instead of baking single colored cupcakes. Make sure not to over fill the liners.

Rainbow cupcakes

After looking at these colorful cupcakes, icing was really not on my mind but thanks to Hannah again, I had a super delicious chocolate icing. Whipped cream, or cooked flour icing is ideal with these cupcakes. To add a festive touch, I tried icing couple of them with white icing and tried making Christmas trees with the icing too. These cupcakes can be enjoyed for up to 3 days when you store them in refrigerator. Remember to warm them up for not more than 10 seconds before eating.

Rainbow Cupcakes

Ingredients

Makes 24 mini cupcakes

  • 240 gms cake flour (you can use all purpose flour too but this helps to make the cake soft, and spongy)
  • 1 tsp baking powder
  • ½ tsp baking soda
  • ½ tsp salt
  • 120 gms sugar
  • ½ cup oil
  • 5 tsp vanilla extract
  • 1 cup milk
  • 1 tbsp vinegar
  • Different gel colors ( I used blue, orange, pink, yellow, green, purple, and red)

Recipe

Mix the milk and vinegar in a bowl big enough to add the wet ingredients and keep aside for couple of minutes (1-2 minutes is enough). Combine cake flour, baking soda, baking powder, and salt and sift it 1-2 times so that the ingredients get mixed properly. Put the sifted flour in a deep bowl. Add the sugar and mix well.

Add the oil and vanilla extract to the milk and vinegar mix and whisk well (atleast 2-3 minutes) till all the ingredients are mixed well. Add this liquid to the dry ingredients. You can make a well in the dry ingredients and add the liquid ingredients and mix it using a whisk. Do not over mix this batter. Just mix it enough so that there are no lumps.

Divide the batter into 7 bowls. Add few drops of color to each bowl and mix gently till the color is incorporated into the batter completely.

Preheat the oven to 180 degrees celsius. Line the cupcake mould with cupcake liners and fill each mould with different color batter. Do not fill the liners more than 2/3rd with the batter. Bake the cupcakes for 15-18 minutes. The cupcakes are done when you put a toothpick in the center of the cupcake and the toothpick comes out clean.

Cool the cupcakes completely and ice with the desired icing. I have used chocolate butter cream icing. The cooked flour frosting goes very well these cupcakes.

Ker Sangri

Ker Sangri

Ker sangri is one of the most popular dishes from Rajasthan.  Ker sangri are dried berries and beans which are found in abundance in the desert. They do not look edible at first look but you have to taste this curry to know why it is so popular in Rajasthani cuisine. It is a part of almost every Rajasthani wedding menu. There are different ways to prepare this curry. This is the recipe which is cooked at my place.

You need to soak ker sangri overnight. Some people soak this in buttermilk too but plain water works fine. It swells to more than double in size. Make sure to wash it well under running water to get rid of any impurities.

If you do not have dry mango powder, you can use tamarind water to add the sourness. This curry is ideal for travelling too as it stays good for 2-3 days without refrigeration. This curry tastes best with puri, missi roti, paratha, and rotis.

Ker Sangri

Ingredients

Serves 2-3

  • ½ cup ker sangri
  • 8-10 cashewnuts broken
  • 10 raisins
  • 2 dates chopped
  • 3 tbsp oil
  • ¼ tsp cumin seeds (jeera)
  • ¼ tsp mustard seeds (rai)
  • 2 dry red chillies broken
  • ¼ tsp asafetida (heeng)
  • 2 tsp red chilli powder
  • 2 tsp coriander powder
  • ¼ tsp turmeric powder
  • 1 tsp dry mango powder (amchur)
  • 2 tsp sugar
  • ¼ cup water
  • Salt as per taste

Recipe

Soak ker sangri in water over night. Wash it well under running water.  Bring 4-5 cups of water to boil and add the ker sangri, cashews, dates, and raisins. Let them boil for 8-10 mins or until they are tender. Drain the water.

Heat oil in a deep pan or kadhai. Add mustard seeds, cumin seeds, asafetida, and dried red chilli. Once the seeds pop, add the boiled ker sangri, cashews, and raisins, salt, red chilli powder, turmeric, coriander powder, sugar, and dry mango powder and ¼ cup water. Mix well. Cook for 10-12 mins till the oil floats on top. Serve with puri, roti or parathas.


Tzatziki (Healthy Greek Dip)

Tzatziki

One of the reasons I love winters more is the barbecues.  A nice chilly weather, traditional coal barbecue grill, and family and friends are a perfect definition of happy family time for me. I can sit and cook all night.

My most favorite part of barbecues is the different dips and sauces. I like to keep them healthier and don’t want to lose the taste at the same time. This Greek dip is one of the healthiest dip I know. This can be enjoyed with kebabs, grills, burgers, falafels, chips, vegetables etc.

Greek yogurt is one of the healthiest things to eat. If the quality is right, you will not even realize the absence of cream, cream cheese, or any other fatty stuff. I get the Greek yogurt available in store and hang it for further 2-3 hours to get any remaining water out. you can use the yogurt set at home too. The idea is to get all the water out of the yogurt to get a creamy and thick yogurt. Once it is whipped well, it is as creamy as mayonnaise, or fresh cream.

Cucumber with its cooling properties is a perfect choice for this dip. Make sure to de-seed the cucumber and chop it as finely as you can. Dill is cucumber’s best friend when it comes to salads or dips. If you can add fresh dill, that’s the best. I like this dip with nachos, slivered carrots and bell peppers. This can be stored in fridge for 2-3 days. I made this for the Halloween party recently and it was loved by everyone.

Tzatziki

Ingredients

Makes 3 cups

  • 2 cup hung yogurt/Greek yogurt
  • 4 tbsp olive oil
  • 1 ½ tbsp vinegar
  • 4 cloves garlic, crushed
  • ½ tsp white pepper
  • 1 cucumber peeled, de-seeded, and diced finely
  • 1 tbsp fresh dill, chopped finely

Recipe

I used around  800-900 gms of Greek yogurt  and hanged it in a muslin cloth for around 3 hours to get 2 cups of hung yogurt.

Combine olive oil, vinegar, garlic, salt, and pepper in a bowl. Mix until well combined. Using a whisk, blend the yogurt well. Add the olive oil mixture to the yogurt mixture and mix well. Add the cucumber and dill and mix well. Chill for at least 2-3 hours before serving. Serve with vegetable crudités, chips, or nachos.

Cham Cham Pops (Indian Dessert Pops)

Cham Cham Pops (Indian Dessert Pops)

Chamcham pops or you might want to call them rasgulla pops going by their look. Its an east meets west experiment gone right. Cham cham is a famous sweet in India. It is made with fresh chenna and cooked in sugar syrup. This is my idea of dressing up the traditional Indian sweet as cake pops. Chilled cham chams iced with khoa cream taste just perfect for people who like sweets with a twist. The same taste and texture but without the mess of sugar syrup and overdose of sweetness.

Fresh and full fat milk makes the best chenna. Make sure there is no water left in the chenna otherwise it will be very difficult to roll the chenna balls. You can add colors of your choice to the chenna. I used the gel colors and added them just before mashing the chenna.

Do not over boil the sugar syrup. Add the chenna balls as soon as the syrup starts boiling and do NOT touch the cham cham unless it is cooled and chilled. Let it sit for at least 6 hours or more if possible.

For the icing, you can be as creative as you want. You can just simply dip the cham cham in khoa cream and roll it in dessicated coconut, coarsely  ground dry fruits, sprinkles etc. Or you can just fill the icing in a piping bag and ice it as you want.

As this is made with fresh milk, the shelf life of this dessert is not as long as other sweets. Two days is the max this can stay in the fridge. Chill it well before serving.

Cham Cham Pops (Indian Dessert Pops)

Ingredients

  • 3 cups milk (preferably full fat)
  • 2-3 tbsp lime juice
  • 2 cups sugar
  • 4 cups water
  • 1-2 pinches food color (optional)
  • 1 tbsp plain flour or corn starch for dusting

For the khoa cream

  • ½ cup khoa
  • 3 tbsp icing sugar
  • 2-3 tbsp milk
  • ½ tsp cardamom powder (Ilaichi powder)
  • 1-2 pinches food color (optional)

Recipe

Bring milk to boil. Switch off the gas as soon as the milk starts boiling. Let it sit for 3-5 minutes. Keep stirring in between. Dilute the lime juice with some water. Start adding 1 tbsp lime juice at a time. Stop adding the lime juice when the milk curdles. Let it sit for 3-5 minutes. Take a white cheese cloth and spread it in a deep bowl. Put the curdled milk and tie the cloth. Now run the tied cloth under fresh water for 2-3 minutes so that the chenna (curdled milk) gets washed and gets rid of the lime flavour. Hang it over a sink or any clean place  where water can drip. Let it hang for 20-30 minutes so that all the whey is strained out.

Transfer the chenna to a flat surface or a wide plate. Mash the chenna well using the heel of your palm. If you wish to make colored cham cham, add color at this point and mash the chenna well. Divide the chenna into 16 portions and roll them into smooth balls without any cracks. Keep these chenna balls on a plate dusted with plain flour or corn starch.

Combine sugar and water in a pressure cooker and bring to boil. As soon as the sugar syrup starts boiling, add the chenna balls. Close the lid and cook on high heat for 1 whistle. Reduce the heat to low and cook for 8-9 minutes. Switch off the heat and put the cooker under running water to release the steam. Open the cooker and transfer the chamchams and the sugar syrup to a bowl. Do NOT touch the cham cham until they are completely cooled. Let the cham chams cool down and refrigerate them for 7-8 hours.

To make the khoa cream, blend the khoa, icing sugar, milk, and cardamom powder to a smooth paste. If you want to add color to your icing, add color at this point. You can change the consistency of this icing as desired. Add or reduce milk based on the how you want to ice the pops. If you want to dip the pops in khoa cream, keep the consistency runny. Keep the consistency stiff if you want to ice it using a piping bag.

Put a cham cham in cocktail stick and ice it as you like. You can dip it in the icing or put the icing in an piping bag and ice it as you like. Serve chilled.

Szechwan Rice

Schezwan Rice

Szechwan cuisine is known for its liberal use of garlic and spices and what more do we Indians need to like Chinese cuisine or any other cuisine for that matter :-).  Indian streets are dotted with number of Chinese street food stalls. They sell all kinds of spicy and colorful Indian Chinese dishes (it’s kind of new cuisine now). Szechwan rice is the Indianized spicy version of the Szechwan rice.


Again, there are different versions of this recipe. You can add celery, spring onion, Sichuan peppers too. Some people add ajinomoto (MSG) to get that “Chinese food taste”, but I prefer it without the MSG. You can also add a little orange color for that street food look. As the dish is cooked on high heat throughout, chop the vegetables very fine so that the vegetables are cooked well. Cooking on high heat also adds a smoky flavor to the dish.

This is one of the best recipes that my aunt makes. She always prepares the sauce in advance and whips up this spicy dish every time we crib about the dinner being too boring. You can prepare the sauce in advance and keep it in fridge in airtight container. Make sure the rice is not over cooked. you can also use the sauce for stir fries.

You can serve Szechwan rice with a sauce of your choice or it tastes good just by itself.

Szechwan Rice


Ingredients

Serves 2

  • 2 cups cooked rice
  • 10-12 dry red chillies (tops removed) soaked in hot water for 10 mins
  • 3 inch piece of ginger
  • 5-6 cloves garlic
  • ¼ cup chopped tomatoes
  • ½ cup onions finely chopped
  • ½ cup finely grated cabbage
  • ¼ cup beans finely chopped
  • ¼ cup carrots finely chopped
  • ¼ cup capsicum finely chopped
  • ¼ cup celery finely chopped
  • 2 tsp soy sauce
  • 2 tsp vinegar
  • 2 tbsp sesame oil/any other cooking oil
  • Salt to taste

Recipe

Szechwan Sauce

Grind tomato, ginger, garlic, and red chillies to a smooth paste.  Heat 1 tbsp oil in a thick bottomed pan. Add onions and cook for few minutes (1-2) till they are translucent and pink. Add cabbage and cook for 2-3 mins. Add the tomato chilli paste and mix well. Keep mixing it every 30-40 seconds. Cook till oil separates. Transfer this sauce to a bowl and keep aside.  This sauce can be used for stir fries too. Once it is completely cooled, you can store it in fridge for upto two weeks in an air tight container.

For rice

Heat 1 tbsp oil in a wok/kadhai.  Add finely chopped celery and sauté on high heat for 30-40 secs. Add carrots and beans and sauté for 1-2minutes on high heat. Add capsicum and sauté for 1 minute. Add salt and cook for 1-2 mins. Add the schezuan sauce and mix well. Add this gravy to the cooked rice. Mix well and serve hot.

Spicy Pizza Sandwich

Spicy Pizza Sandwich

Sandwich is one of the most versatile snacks. You can fill it with anything you like and the Spicy Pizza sandwich is my version of one of the most loved food on the planet. This very easy, quick, and spicy recipe can be changed as per individual tastes by adding the toppings(or fillings) of one’s choice. If you love pizza, you will surely enjoy this sandwich version of pizza.

Just think of the toppings you like on your pizza and add them to this filling. You can make it healthier by reducing the amount of cheese, using whole wheat bread instead of white bread and by adding more vegetables. I use a mix of cheddar and mozzarella cheese but just cheddar or just mozzarella works fine too.

Coming to spice, I like my snacks spicier. I add very finely chopped ginger to the filling. It adds both spice and flavor to the filling. You can add or reduce the quantity of ginger and chilli flakes as per taste. You can also add other fresh or dried herbs like basil, thyme, or pizza seasoning.

You can prepare the filling in advance and refrigerate it for up to a week. This is a quick snack for evening or even a light dinner when you are too tired to cook.  Serve the sandwiches hot with ketchup or a dip of your choice.

Spicy Pizza Sandwich

Ingredients

Makes 4 sandwiches

  • 1 tbsp olive oil
  • ½ tsp oregano
  • 1 tsp ginger finely chopped
  • ½ tsp chilli flakes
  • 2 tbsp onion chopped
  • 3 tbsp corn boiled
  • 3 tbsp mixed bell peppers chopped or julienned
  • 1 tbsp olives
  • 2 tbsp tomato paste
  • ¼ tsp black pepper powder
  • Salt to taste
  • Cheese to taste
  • 8 slices of bread
  • Olive oil/butter to grill the sandwich

Recipe

Heat oil in a non stick pan. Add oregano and ginger. Sauté and cook on low flame for 30-40 seconds. Add chilli flakes and onions. Cook till onions are translucent but still crisp (30-40 seconds). Add the bell peppers, corn, and olive. Cook for a minute on high heat. Add tomato paste, salt, and black pepper. Mix well and cook for a minute. Switch off the heat and let the filling cool down a little.

Divide the filling into four portions. Spread one portion on a piece of bread. Top it with the cheese of your choice and put another piece of bread on the top. Spray olive oil or spread butter and grill the sandwich till brown on both sides. You can grill it on a tava too (griddle). Serve hot with ketchup or dip of your choice.

Fruit Trifle

Fruit Trifle

Trifle is an English dessert made of layers of fruits, jelly, cake, custard, and whipped cream. This one of my most asked for recipe by my family and friends. I tasted this dessert for the first time in London at my husband’s cousin’s place. It was love at first bite 🙂 . This recipe does not include the sponge cake. This looks difficult but with a little preparation it is a very easy dessert to prepare.

Use fresh fruits whenever possible but the tinned fruits work well too.  I like to use apple, pear, and peach for the bottom layer and cherries, raspberries, and strawberries for the top layer.

You can choose any flavor of jelly but I like raspberry or strawberry jelly with this dessert. Jelly can be set at room temperature. But if you are in a hurry, you can refrigerate the Trifle to set the jelly faster. Make sure the jelly is set before adding the next layer.

Preparing thick, creamy, and lump free custard can be the only tricky part in this recipe. You need to add or reduce the custard powder based on the quality of custard powder you use. I use vanilla flavored custard powder for this dessert. Once you take the custard off from the gas, and it has cooled down a bit, you can blend the custard using a blender to make it smooth and lump free (be careful while blending as the custard might be hot still). Cover the custard with a cling film to avoid getting a dry layer on top of the custard while cooling it.

Whipping cream in India, especially during summers is hoping for magic. After trying innumerable times and failing almost every time, I rely on the ready to whip cream powder or the ready to serve whipped cream for the final layer. When using the ready to serve whipped cream, add it just before you serve the Trifle.

This dessert tastes best when served/eaten chilled. You can set the layers in individual serving sized ramekins and add whipped cream and top it with fruits just before serving.

Fruit Trifle

Ingredients

Makes one 9” bowl of Trifle

Layer 1

  • 250 gms/ 1 cup chopped Fruits (peach, pear, pineapple, cherry, apple)

Layer 2

  • Jelly 40gms/ 2 ½ tbsp
  • 200 ml water

Layer 3

  • Custard vanilla flavor
  • 235 ml/1 cup + 2 tbsp milk
  • 2 tbsp custard powder
  • 1 ½ tbsp sugar

Layer 4

  • Fresh cream (as much as you like)
  • Strawberries/Raspberries/Cherries

Recipe

Mix the custard powder in 2 tbsp milk. Bring milk to boil in a non stick pan. Add sugar and mix well. Add the custard powder and milk paste. Mix well. Keep mixing to make sure that the custard does not stick. Once the custard thickens, switch off the gas and take the pan off the gas. Keep aside to cool. Cover the custard with a cling film to avoid getting a dry layer on top.

Arrange the fruits in a glass bowl. This is the bowl in which you will be adding all the layers.

Take jelly in a dry bowl. Pour boiling water over the jelly crystals and mix well. Once this mixture is slightly cooler, pour this over the fruits and keep it aside to set. Jelly can be set at room temperature too. It takes 20-25 minutes to set.

Once the jelly is set, pour the prepared and cooled custard and spread it evenly. Keep it in the fridge for 40-60 minutes to set.

Whip the cream with sugar as per taste. You can also use the ready whipped cream or ready to whip cream powder.

Add a layer of cream and chill for 2-3 hours. If you are using the ready to use whipped cream, add it just before serving. Top the final layer with fresh berries of your choice. To serve, cut through the layers just like you would cut a cake. Top it with fresh fruits or more whipped cream if you like.


Kachori (Rajasthani Savory Snack)

Kachori (Rajasthani Savory Snack)

Kachori is an Indian snack similar to samosa (its more famous cousin) but yet different. It is a flaky pastry filled with different spices and lentils. Just like other famous snacks, there are lots of varieties of kachoris in different parts of India. This one is my grandmother’s recipe aka Bhoji wali Kachori and one of her most famous ones. Everyone in our family loves this snack made by my grandmother. I love this kachori so much that I do not eat the kachoris available outside. For me THIS is kachori 🙂

The filling made with besan is what makes this kachori different from the other kachoris. Mostly kachoris are filled with different lentils but this one has no lentils. Roasted gram flour and spices complement the flaky crust perfectly.

Only tricky part with this filling/masala is to roast the gram flour(besan) well. If the besan is not roasted properly, the kachoris will not be fluffy. If it is roasted too much, the taste is ruined. It is very important to keep mixing the besan continuously while you roast it. Our house lives on no onion garlic diet most of the times so no onion in this one. You can add onions to this masala if you like.

The dough for kachori should not be too firm. Soft and pliable dough makes better kachoris. Another trick that I learnt from my grandmother is to roll the kachoris twice (only twice) after you have filled the masala and shaped the kachori. This distributes the filling evenly and each and every kachori puffs when you do this.

These kachoris can be stored up to a week in airtight container. Eat them plain or with chutney of your choice or make a chat by adding yogurt and different chutneys.

Kachori (Rajasthani Savory Snack)

Ingredients

Makes 20 kachoris

For Dough

  • 2 cups all purpose flour (maida)
  • 3 tbsp oil
  • ½ tsp salt

For Masala

  • 2/3 cup gram flour (besan)
  • ¼ cup oil
  • 1 tsp red chilli powder
  • ¼ tsp turmeric powder
  • ¼ tsp citric acid (nimbu sat)
  • 4 tbsp chopped coriander
  • 4-5 green chillies coarsely ground
  • ½ tsp garam masala
  • 1 tsp salt
  • Oil for frying

Recipe

For Dough

Mix the all purpose flour, salt, and oil. Add little water at a time and make soft dough. Cover and keep aside for 15 minutes.

For the Masala

Put oil and besan in a thick bottomed pan/non stick pan and mix well. Do not heat the oil before adding the besan. This will help you avoid lumps in the masala. Now switch on the flame and roast the besan and oil mixture for 3-4 minutes on low flame. Roasting time varies according to the heat. The color of the mixture should be light brown. Besan can burn quickly so make sure to keep mixing it nonstop. Switch off the flame. Add green chillies, coriander, red chilli powder, turmeric, citric acid, garam masala, salt, and 1 tbsp water. Mix well. Keep aide to cool.

Divide the dough and masala into 20 equal portions. Take one portion of the dough and stretch it (appx 3 inches) using your fingers. Put one portion of masala in the center and seal the edges and flatten it very lightly.  Roll the kachori twice using a rolling pin. Follow the same process for rest of the kachoris.

Warm oil in a kadhai/thick bottomed pan. Oil should be just warm and not hot when you put the kachoris in for frying. Fry on low flame till the kachoris are golden brown. Serve hot or at room temperature.