Kairi ka Takku (Grated Mango Pickle)

Kairi ka Takku (Grated Mango Pickle)

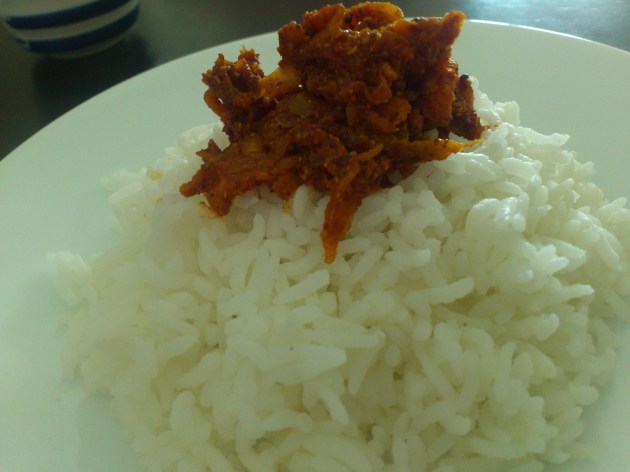
Kairi ka takku or grated mango pickle is an easier and quicker version of the traditional mango pickle which takes lot of time and expertise to make. Takku is made with grated raw mango mixed with powdered spices like mustard, fennel, and fenugreek seeds. This grated mango pickle usually includes onions too but my mom makes it without onions. This is her summer special recipe of the kairi ka takku which she serves with hot rice, dal, and papad.

Sour raw mangoes give the best results for this recipe.  If the mangoes are not very sour, then you can add citric acid (nimbu ka sat). Choose firm mangoes and peel them before grating the mangoes.  Just like Raw Mango, you can also use grated white radish to make Muli ka takku.

Dry roast the masalas seperately for proper roasting and good flavour. Let the spices cool down completely before grinding them. You can roast and grind the spices in quantity and keep them refrigerated for future use too.

Since the masala has fenugreek and mustard seeds, it will taste slightly bitter when you make it but the bitterness will go away in 24-36 hours. You can keep the takku refrigerated for 2-3 weeks. Make sure to use a clean and dry spoon to serve the takku.  This takku tastes best with hot rice and dal. You can serve it as accompaniment to any Indian meal.

Kairi ka Takku (Grated Mango Pickle)

Ingredients

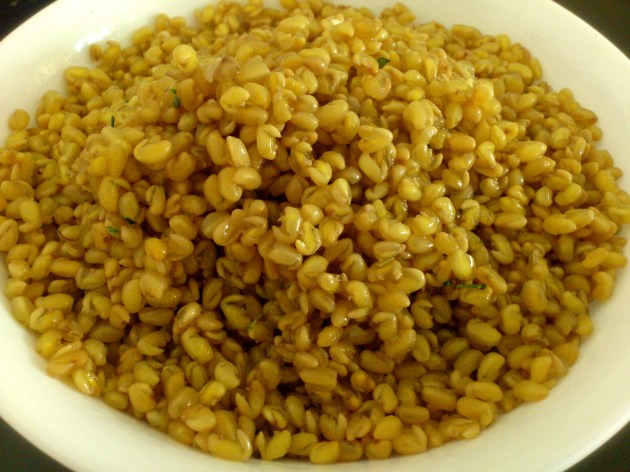
  • 2 ½ cup/300gms raw mango peeled and grated
  • 2 tbsp/25gms mustard seeds
  • 1 tbsp fenugreek seeds (methi)
  • 1 tbsp fennel seeds (saunf)
  • ¼ tsp citric acid (Nimbu sat) (add only if the mango is not sour)
  • 3 tbsp/ 50gms red chilli powder
  • ¼ tsp turmeric
  • 3 tbsp/50gms salt
  • 1/4tsp asafetida (heeng)
  • 1 cup/235ml oil
  • ¼ tsp mustard seeds
  • ¼ tsp cumin seeds
  • 2-3 dry red chillies broken

Recipe

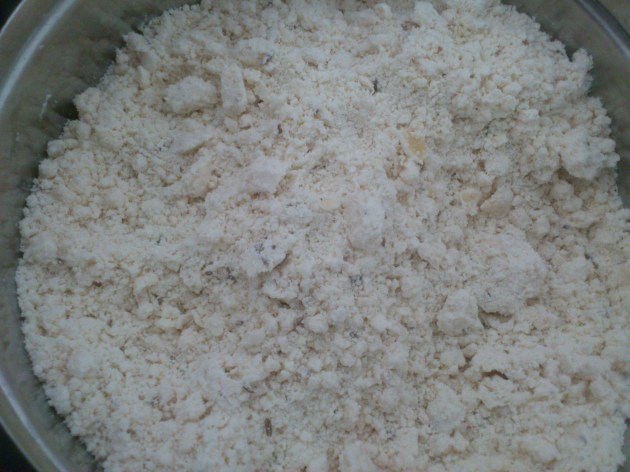
Dry roast the fennel seeds and fenugreek seeds separately. Cool completely. Grind the mustard seeds, fennel seeds, and fenugreek seeds to fine powder. Add red chilli, turmeric, salt, and asafetida to this powder and mix well. Keep aside.

Heat oil and add dry red chillies, mustard seeds, and cumin seeds. Once the seeds pop, switch off the flame and let the oil cool down for 3-4 minutes. Add the masala powder and mix well. Add the grated mango and mix again. Cover and keep aside for 24-36 hours. Mix it occasionally. Once the pickle is done keep it refrigerated. Serve with rice or roti.


Rajasthani Dana Methi Sabji (Dried Fenugreek Seeds Curry)

Rajasthani Dana Methi Sabji (Dried Fenugreek Seeds Curry)

Dana Methi ki sabji or Fenugreek seeds curry is an authentic Rajasthani curry made with dry fenugreek seeds, dried fruits like dates, cashews, and raisins, and sugar or jaggery. People in Rajasthan depend a lot of dried foods like fenugreek seeds, and ker sangri due to the hot weather and unavailability of fresh vegetables. These curries are both tasty and nutritious. This is my mom’s recipe of the dana methi sabji. This is kind of fixed curry for festivals and it is also a good option for travelling as it does not need refrigeration.

Fenugreek seeds have a very sharp, bitter, and pungent flavor. It is very important to soak them and wash them well to get rid of the yellow water and bitter taste. My mom’s tip that works everytime for me is to soak the seeds in warm water and wash them thoroughly in a colander under running water. Some people say you shouldn’t touch the seeds while soaking or they will taste bitter. I am yet to try this tip though.

There are different versions of this curry. You can make it sweet and sour (like this one), spicy version without sugar and dry fruits and with papad, with papad and moong dal dumplings called mangodis. You can substitute sugar with jaggery  if you want to make this healthier.

This curry tastes good with puri or whole wheat parathas. You can serve it cold or hot.

Rajasthani Dana Methi Sabji (Dried Fenugreek Seeds Curry)

Ingredients

Serves 4

  • ½ cup dried fenugreek seeds (dana methi) soaked overnight
  • 2 tbsp oil
  • 8-10 curry leaves
  • 1-2 dry red chillies
  • ¼ tsp mustard seeds
  • ¼ tsp cumin seeds
  • 10-12 cashew nuts
  • 2 tsp red chilli powder
  • ¼ tsp turmeric powder
  • 2 tsp coriander powder
  • 10-12 raisins
  • 2-3 dates chopped
  • ¼ cup chopped raw mango (replace with 1 tsp dry mango powder (amchur) if raw mango is not available)
  • 4 tsp sugar
  • 1 tbsp water
  • Salt to taste

Recipe

Drain the water from methi seeds and put them in a strainer. Wash them under running water for 1-2 minutes to drain out the bitter taste.  Keep washing till the water that you drain from the seeds is clear (it should not be yellow)

Heat oil in a thick bottomed pan or kadhai. Add curry leaves, dry red chillies, mustard seeds, cumin seeds, and cashewnuts. Once the cashews are light brown, add the soaked methi seeds, raw mango pieces, salt, red chilli powder, coriander powder, raisins, and dates. Mix well and cook for two minutes on low flame. Add sugar and 1 tbsp water. Mix well and cook for two minutes. Remove from heat. Over cooking this curry will spoil its taste. Serve hot with parathas or puri.

Pesarattu (South Indian Savory Crepes)

Pesarattu (South Indian Savory Crepes)

What Childaa or Chilva is to Rajasthan and North Indian, Pesarattu is to Andhra Pradesh and South India. It is a crepe or dosa like snack made with split green grams (called Pesar Pappu in Telugu; thus the name Pesarattu).  It is a very filling and healthy breakfast.  It also has a variation called MLA Pesarattu which is made by filling the pesarattu with a layer of upma.

You can make the pesarattus thin and crispy or slightly thicker. To make the pesarattu thicker, keep the batter coarse. The consistency of batter should be like dosa batter. You can add asafetida, garlic, fresh coriander to the batter while grinding it but it is optional.

In North India, it is filled with grated paneer and in south its eaten plain or filled with a layer of upma or chopped onions. You can also add grated carrots to the filling if you like. This tastes best with coconut chutney or garlic chutney.

Pesarattu (South Indian Savory Crepes)

Ingredients

Makes 12-15

  • 1 cup split green gram (moong dal) soaked for 6-8 hours
  • 2 inch piece of ginger
  • 2 green chillies
  • ¼ cup chopped onions
  • ¼ cup grated paneer (Indian cottage cheese)
  • Salt to taste
  • Oil/ghee/butter for cooking

Recipe

Wash the moong dal and soak in water for 6-8 hours. Drain the water and grind the moong dal, chillies, ginger, and salt to a smooth paste.  Add little water if required. The consistency of the batter should be like of a dosa batter.

Heat a flat griddle (tava). Spray or smear some ghee/oil and wipe it. Pour a ladle full of batter and spread it thin on the griddle. Top it with grated paneer and onions. Spray or drizzle oil/ghee/butter around the pesarattu. Cook for 1-2 minutes. Turnover and cook for another 1-2 minutes. Serve hot with coconut chutney or tomato chutney.

Dal ka Seera (Moong Dal Halwa)

Dal ka Seera (Moong Dal Halwa)

Moong dal halwa or Dal ka seera as it is called in marwadi is probably one of the best desserts from Rajasthan. It is a dessert made from coarsely ground split yellow moong dal, ghee, sugar, and dry fruits. Given the small list of ingredients, it is not at all a quick dish to prepare. Have loads of time at hand and want to give your arms a workout – then do go for this one. It is worth all the hard work. My mom prepares this in kgs for family and friends and this is her recipe. Very easy to prepare and minimal ingredients but tons of hard work and patience. Want to give it a try? Read on!

Do not reduce the amount of  ghee. It is a very important part of getting it right. Traditional sweets are high on fat and sugar but that is the reason they are unmatched and still so popular. You can replace khoa with condensed milk if khoa is not available. I like to keep it as authentic as possible so that it can match the taste of my mom’s recipe.

Use the husked moong dal and soak it in plenty of water for a good 6-8 hours. I like the seera grainy so I don’t grind the dal too fine. Grinding the dal coarse (resembling sugar) with prevent the seera from becoming sticky and paste like.

The most important part is roasting the ground dal. This is where all the hardwork comes in. You have to make sure that you roast it in on a low flame. Semolina is added to the ghee before adding the dal so that the dal does not stick a lot to the pan. But you need to keep scraping the edges and mixing it non stop till the dal stops sticking to the pan.

By end of appx 30 minutes, you should have nice brown granules of roasted dal. The aroma is enough to tell that the dal is roasted (or over roasted 🙂 )

The color of the roasted dal should be liked the skin of almonds. To make sure that the dal is roasted properly, keep mixing it even if the dal stops sticking to the pan.

The second important thing is the sugar syrup. It should be less than one string (approximately 220 degrees F or 85-90 degrees C. Cool it for couple of minutes before adding the dal.

This is  a winter time dessert and  it tastes good when it’s hot. If it gets too cold or dry, add a table spoon of milk and reheat it. Do not add water to reheat the seera.

Dal ka Seera (Moong Dal Halwa)


Ingredients

  • ½ cup yellow split moong dal
  • ½ cup sugar
  • ¼ cup khoa
  • ½ cup ghee
  • 2 tbsp almonds chopped
  • ½ tsp cardamom powder (ilaichi)
  • 1 tsp semolina (rava)
  • 1 cup water

Recipe

Soak the moong dal in water for 6-7 hours. Drain water and grind the mung dal coarsely.

Heat ghee in a thick bottomed pan or a thick kadhai. Add semolina and sauté for 10-20 seconds. Add the moong dal paste and keep mixing it on slow flame till the dal is brown in color. Add khoa and mix again for 2-3 minutes. Transfer the moong dal mixture to another bowl and keep it aside.

To make the sugar syrup, mix sugar with 1 cup water and bring to boil. Cook for 3-4 minutes. The consistency should be less than 1 string (approximately 200 degrees F/85-90 degrees C). Switch off the gas. Let the syrup cool for 2 minutes. Add the moong dal mixture and mix well. Switch on the gas and cook for 2 minutes while mixing continuously. Add almonds and cardamom powder and mix well. Serve hot.

Quick Bisi Bele Bath

Quick Bisi Bele Bath

Bisibele bath is a dish from Karnataka but also popular in Hyderabad. It’s a spicy and sour mix of rice and lentils.  My mom uses left over rice and dal to make excellent instant bisi bele bath. It’s a quick makeover to the left over dal rice. Just add some mixed vegetables, spices and you have an interesting and delicious breakfast/lunch dish ready.

Hyderabad has numerous restaurants which serve a dish called sambar rice with veggies. This recipe of my mom comes closest to it. My mom uses the khatti dal that we prepare at home. You can use any toor (split pigeon pea) based dal. I haven’t tried this dish with other lentils yet. If you are using a dal which is not sour, add tamarind water while cooking.

You can use any vegetables you like for this dish but I prefer carrots, beans and peas. The main ingredients for this dish are sambar powder and the karampodi. They take this simple dal rice mix to another level. You can add or reduce the karampodi as per your preference of spice in food.  Bisibele bath can be served a breakfast or lunch. It tastes best when it is hot.

Quick Bisi Bele Bath

Ingredients

  • 2 tbsp oil
  • ¼ tsp mustard seeds
  • ¼ tsp cumin seeds
  • 4-5 dry red chillies
  • ¼ tsp asafetida
  • 8-10 curry leaves
  • 1 small onion chopped
  • ¼ cup mixed vegetables chopped (carrot, beans, peas)
  • 1 small tomato chopped
  • ½ tbsp sambar powder
  • 1 tbsp karam podi (gun powder served with idlis or south Indian meals)
  • 1 tsp red chilli powder
  • 1 tsp coriander powder
  • ¼ tsp garam masala
  • ¼ tsp turmeric
  • 2 cups cooked rice
  • 1 cup dal (I used the khatti dal my mom prepares at home)
  • 1 tbsp tamarind water (optional)
  • 1 cup water
  • 2 tbsp coriander
  • Salt to taste

Recipe

Heat oil in a pressure cooker.  Add mustard and cumin seeds. Once the seeds splutter, add dry red chillies, asafetida, and curry leaves.

Add onions and vegetables and sauté for 1-2 mins. Add tomatoes and cook for 30-40 seconds. Add sambar powder, karam podi, red chilli powder, coriander powder, garam masala, and salt. Mix well. Add dal and 1 cup water.  Close the cooker and cook till the pressure is released once (one whistle). Switch off the gas after one whistle. Once the cooker is cooled, open and add rice and mix well. Close the cooker again and cook on slow flame till you get two more whistles. Open the cooker once it is cooled completely. Add chopped coriander and serve hot with papad and lime pickle.

Idli

Idli

Idli is my most favorite food. I can have it for breakfast, lunch, and dinner. This popular and healthy breakfast from south India is a sour dough preparation made with urad dal and rice. Dal and rice are soaked, ground and fermented overnight. The batter is then steamed in special idli moulds to get soft and fluffy idlis. This recipe is my mom’s recipe using urad dal and idli rava. These are the idlis you get in Hyderabad and for me these are the best idlis in the world. You can get idli in Hyderabad 24×7. There are famous road side joints which have people queuing up at even 2 am for soft melt in the mouth idlis.

Idli recipe looks very simple but getting soft and fluffy idli takes lot of effort and experience. It depends on the quality of urad dal and idli rava. If the rava is not washed properly, the idlis will turn out yellow. Adding fenugreek seeds to the urad dal will help the batter ferment well. If the dal is less, idlis will be hard. Some people add poha to the urad dal. But adding excess poha will make the idlis flat.  Adding bottled or cold water while grinding the batter also helps to make the idlis softer.

The consistency of idli batter should be like whipped cream. It should fall of from spoon easily. Do not over fill the mould. Leave some space for idlis to expand. Idlis can be enjoyed with different chutneys and sambhar. The most common combination for idli is coconut chutney and sambhar. I like it with karam podi.

Idlis make one of the healthiest breakfasts. Top the idlis with ghee or butter if you like.

Idli

Ingredients

Makes 20-30 idlis depending on the size of Idli mould

  • 500 gms (2 cups) Idli rava
  • 200 gms (3/4 cup) urad dal
  • 10 grams (2 tbsp) fenugreek seeds

Chutney

  • ½ cup coconut
  • 3 green chillies
  • ½ cup yellow roasted chick peas
  • ¼ cup ground nuts roasted
  • 1 inch piece of ginger
  • Salt to taste

For chutney

Grind all the ingredients for chutney to a smooth paste using little water.

For Idli

Wash the idli rava 3-4 times under running water. Soak in water and keep aside 6-7 hours.  Wash the urad dal and fenugreek seeds 3-4 times under running water.  Soak in water and keep aside for 6-7 hours. Drain water from urad dal and grind it to a smooth paste adding little water. Drain the water from idli rava and add the urad dal paste to it. Add salt and cover and keep aside over night to ferment. Remember to leave enough space in the utensil for the batter to rise as it ferments. If the temperature outside is cold, keep the batter in a microwave or oven (do not switch them on) or any warm place.

Once the batter is fermented, mix it lightly. Pour the batter in greased idli mould and steam for 8-10 minutes. Check the idli and steam again for few minutes if required. Serve hot idlis with chutney and sambar.


Tomato Garlic Chutney

Tomato Garlic Chutney

Chutneys are an important part of south Indian cuisine. There are different varieties of chutneys in a typical south Indian meal. This tomato chutney is instant side dish made of tomatoes, garlic, onions with a dominating flavor of coriander seeds. I learnt this recipe in Bangalore and this is a true savior when you want to add that extra zing to your boring dal rice meals.

This chutney tastes well with the sour Indian tomatoes. If the tomatoes you are using are not too sour, you can add lime juice as per taste. Cook this chutney of slow flame throughout and keep mixing in between. Coriander powder tends to burn soon so it’s important to keep the flame low. This chutney tastes well with hot rice and a generous dollop of ghee. This goes well with hot puris too.

Tomato Garlic Chutney

 Ingredients

  • 4 red tomatoes
  • 5 cloves garlic
  • 1 onion chopped
  • 2 tbsp coriander powder
  • 1tbsp red chilli powder
  • ½ tsp mustard seeds
  • ½ tsp cumin seeds
  • 2 dry red chillies
  • 1 tbsp oil
  • 10-12 curry leaves

Recipes

Heat oil in a thick bottomed pan. Add cumin and mustard seeds. Once the seeds splutter, add curry leaves and dry red chillies. Add garlic and let it brown. Add onions and fry for 1-2 mins till they are translucent. Add the coriander powder and sauté for 1-2 mins till there is aroma of coriander. Add tomatoes, salt, turmeric and red chilli powder.

Cook on slow flame stirring occasionally for 5-7 minutes till the tomatoes are pulpy. Use back of a flat cooking spoon to mash tomatoes. Cook till the tomatoes become mushy and oil separates. Serve with hot rice and ghee.


Namak Para (Indian Savory Pastry)

Namak Para (Indian Savory Pastry)

Namak para is a popular savory tea time snack. It is a part of the variety of sweets and snacks made in marwadi homes during Diwali. This fried Indian pastry seasoned with cumin and carom seeds is a favorite with tea. My mom makes this snack in batches of huge tin boxes as every one at home loves to have them with the morning tea. This used to be a popular travel snack whenever we travelled. Namak para with lime pickle is an awesome combination.

The crunch of this snack should be like a pastry and that calls for ghee or butter to be added in the dough. You can use oil too but I like it light, flaky, and buttery. The basic rule of pastry applies with namak para too. Add all the dry ingredients before adding butter. Use cold butter and work quickly using your finger tips for a lighter pastry. The flour should resemble bread crumbs. If the fat you are adding is hot, it will absorb more oil while frying and the namak para will be heavier. Add cold water and add as less water as possible and add it gradually.  Do not over knead the dough. After you rest the dough, just knead it lightly.

You can make namak paras in any shape. The diamond shape is the most popular one in India. Fry the namak para on a slow or medium flame. Cumin and carom seeds are the most common flavours. You can experiment with other herbs too like kasuri methi or even oregano. Coarsely ground black pepper can be added for a hint of spice. Namak para can be stored in an airtight container for 3-4 weeks. These can be served with tamarind chutney or lime pickle.

Namak Para (Indian Savory Pastry)

Ingredients

  • 1 cup all purpose flour (maida)
  • 1 tbsp semolina (optional)
  • 4 tbsp Oil/butter
  • 1 tsp salt (you can add the salt as per taste)
  • ½ tsp cumin seeds (jeera)
  • ½ tsp carom seeds (ajwain)
  • Ice cold water
  • Oil for frying

Recipe

Lightly pound the cumin and carom seeds. Mix the all purpose flour, salt, cumin and carom seeds. Rub the butter using finger tips. The flour should resemble bread crumbs. Add little cold water at a time and knead stiff dough. Cover with a damp cloth and keep aside for 15 minutes. Knead again lightly and divide the dough into four portions.

Roll each portion to a 1/8cm thick circle. Cut into desired shape. Diamond is the commonly used shape. Heat oil in a kadhai or a deep pan and fry the namak para on slow flame till they turn light brown on both sides.

Cool and store in an airtight container.

Manchurian Pav

Manchurian Pav

Manchurian Pav or Manchuria Pav as it is known in Hyderabad is a street food from Hyderabad. It is a twist to Pav Bhaji and what a yummy twist! I love it. Despite the fat. That is why I decided to try making it at home so that I can make it healthier. I am yet to find a city (with exception to Mumbai) where you can get yummy food 24×7. Street food in Hyderabad is amazing. The city is dotted with tons of stalls selling roadside snacks. One such place is a juice/pan shop called Mayur. I don’t know if this dish is available elsewhere but I love it at this place.  I always prepare extra bhaji and freeze it for the days I am too tired to cook. It comes in handy for quick snacks like this one.

This snack should be cooked on high heat throughout. Idea is not to let the capsicum lose it’s crunch or not to overcook the onions. It should be cooked but still crunchy.  You can cook it in butter if you like but using oil or even olive oil does not alter the taste a lot.

This dish gets soggy very fast. You need to make it just before eating. You can prepare the ingredients in advance and cook it just before eating/serving. This is a perfect snack with evening tea or for that 5 pm hunger. You can enjoy this Indian fast food with hot tea or finish it off with a glass of chilled juice.

Manchurian Pav

Ingredients

  • 2 Pavs/burger buns cut into 8 pieces each
  • 4-5 tbsp bhaji
  • 1 tbsp oil
  • 1 small green chilli chopped
  • 1 tsp ginger finely chopped
  • 1-2 cloves garlic chopped
  • 2 tbsp onions chopped
  • 2 tbsp capsicum chopped
  • 2 tsp pav bhaji masala
  • ¼ tsp garam masala
  • 1 tsp fresh coriander chopped
  • 1 tbsp sev
  • salt to taste

Recipe

Heat oil in a deep pan or kadhai.  Add ginger, garlic, and green chillies and cook for a minute. Add onions and cook for a minute or till the onions are translucent. Add capsicum and cook for 30-45 seconds. Add pav bhaji masala, garam masala, bhaji, and salt. Mix well. Add the pav pieces and mix well. Transfer to the serving dish and top it with sev and chopped coriander. Serve immediately.

Vegetarian Lasagna

Vegetarian Lasagna

Lasagna or Lasagne as it is known in Italy is one of the oldest Pastas. This flat sheet of pasta is cooked in alternate layers of pasta, sauce, and cheese. This is not a quick or easy dish to make but the taste and flavours make up for all the hard work. I learnt this vegetarian version while studying in the UK and improvised on it over time. This is my kind of Friday night dinner when friends come over and the dinner continues almost till Saturday morning.

The most common vegetarian lasagne I have seen is the one with spinach and white sauce. I use both white and red sauces. For the red sauce you can also include vegetables like zucchini or squash. You can grill the vegetables and chop them if you want to add a smokey flavour to the red sauce.

I like to keep the white sauce very simple. No cream, No butter, and No cheese. My idea is to get the flavour and taste from herbs. I use lots of fresh basil leaves.

Even with the layers of cheese, you can choose to just sprinkle the cheese instead of adding full layer every time. I use ricotta, cheddar, mozzarella, and Monterey Jack cheese. The grated cheese packets available in supermarkets can save a lot of time and money. They come in variety of cheese mixes like Italian pasta and Mexican flavours.

Choose a rectangle dish to bake pasta and cut the pasta sheets if required. You can make lasagne in advance and heat it up when required. Just like pav bhaji, pasta also tastes better the next day. Lasagna is a meal in itself and can be enjoyed as lunch or dinner.

Vegetarian Lasagna

Ingredients

Serves 5-6

  • 10 lasagna sheets
  • Cheese (cheddar, ricotta or cottage, mozzarella) as per taste

Red Sauce

  • 2 tbsp olive oil
  • 1 tsp oregano
  • 2 ½ tbsp. chopped garlic
  • ½ cup chopped onion
  • ½ cup chopped mixed bell peppers
  • ½ cup chopped carrots
  • ½ cup broccoli florets steamed for 2 minutes
  • 1 tsp chilli flakes
  • 1 cup chopped tomatoes
  • 2 cups tomato puree
  • Salt as per taste

White Sauce

  • 2 tbsp olive oil
  • 4 tbsp all-purpose flour (maida)
  • 1 cup milk
  • 1/2 cup chopped fresh basil leaves
  • 2 tsp black pepper powder
  • Salt as per taste

Recipe

For the Red Sauce

Heat oil in a thick bottomed pan. Add chopped garlic and oregano. Cook for 1 minute. Add chopped onions and chilli flakes. Cook for 1-2 minutes or till the onions are translucent. Add carrots and bell peppers. Cook for 2-3 minutes. Add tomatoes and cook for 1-2 minutes. Add tomato puree and salt and cook for 8-10 minutes mixing the sauce occasionally. Add broccoli and cook for 1 more minute and switch off the heat. Keep aside.

For White Sauce

Heat oil in a thick bottomed pan. Add the all-purpose flour and sauté for 1-2 minutes. Do not let the flour get brown. Add milk and mix well ensuring there are no lumps. One way is to switch off the heat, cool the sauce a little and blend it smooth using a hand blender. Put the sauce back on gas and add salt, pepper, and basil. Cook till the sauce thickens (approximately 2-3 minutes). Cover and keep aside.

Boil the lasagne sheets as per the instructions on the pack.

To Assemble the Lasagna

Take an oven proof dish. Spread a layer of red sauce. Cover it with lasagna sheets. Spread a layer of white sauce. Sprinkle some cheese or add a layer of cheese if you like cheese. Add a layer of lasagna sheets followed by layers of red sauce, lasagna sheets, white sauce, and cheese. Finish with a final layer of lasagna, red sauce, white sauce and cheese on the top.

Cover with an aluminium foil. Bake at 200 degrees for 20 minutes. Uncover and bake for 12-15 minutes or till the cheese is crusty and brown on the sides. Let it rest for 5-6 minutes before serving.